
QuadStick Mouthpieces
While visiting Atrium’s rehabilitation center, I was asked to create more mouthpieces for the hospital’s sip-and-puff controller technology called the QuadStick. The OTs and PTs were forced to use the same mouthpieces as patients because there were so few available. Our goal for this project was to create multiple mouthpiece sizes so that: 1) they would attach to their version of the QuadStick technology; and 2) patients would have narrow and wide options for different needs. We would also mass produce these mouthpieces so patients at the rehab center could have their own mouthpiece (or set of mouthpieces) and take them home once their time at the center is over.
Here is my design specification document: Design Specifications
I began by finding files for the QuadStick mouthpiece. I found this QuadStick GitHub Repository which was created by Fred Davidson. On this repo I found four files: narrow and wide mouthpiece models with three holes, and narrow and wide models with four holes.
My project will be different then this inspiration because I will make a file with all four variations, most likely increase the size of the mouthpieces, and then I will add the screws and connectors into the mouthpieces themselves. (The discussion of these screws and connectors is to come)
I then created a file containing all four variations; it can be found here. This file can now be used to mass-produce these mouthpieces, and the rehab center can do so as well once they have their own 3D printers. To ensure patient and staff safety, they should be printed on a 3D printer dedicated solely to this production and using food-safe PLA. Below is a picture of the mesh QuadStick mouthpieces in Fusion360:

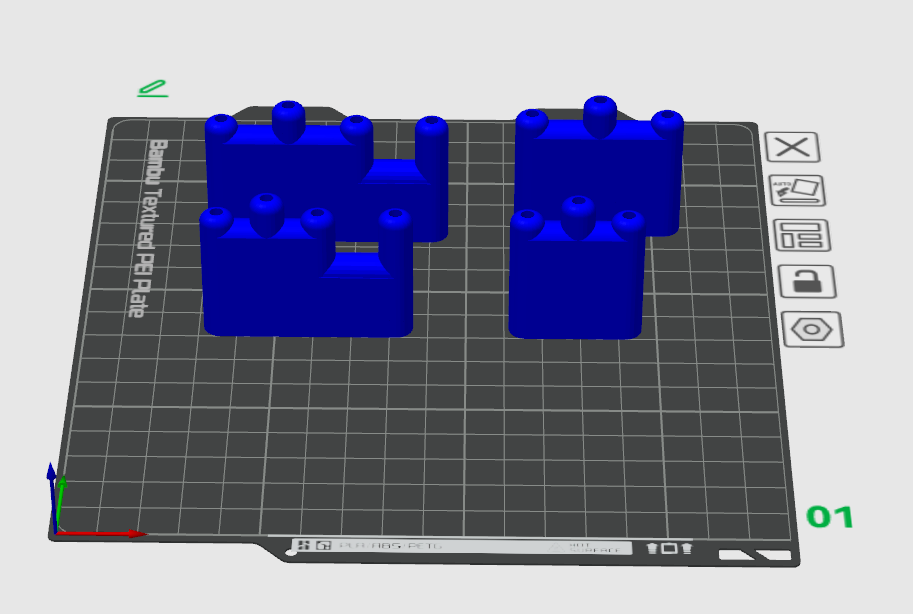
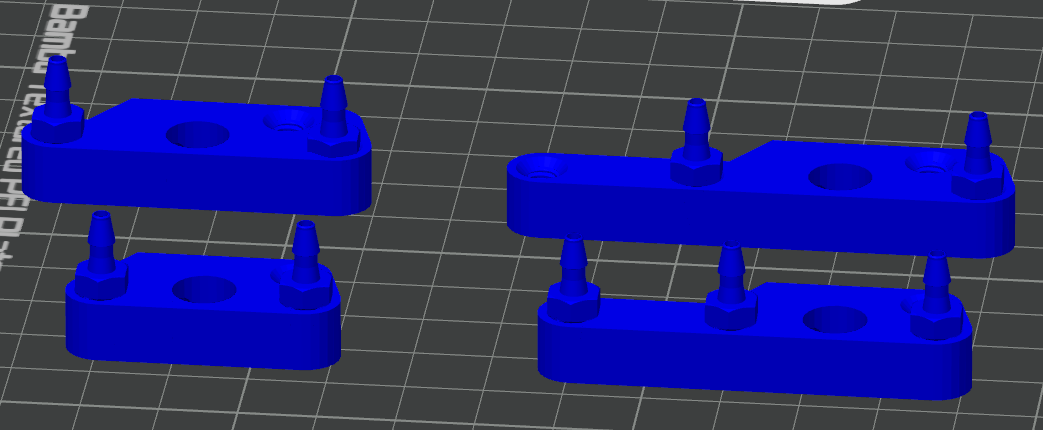
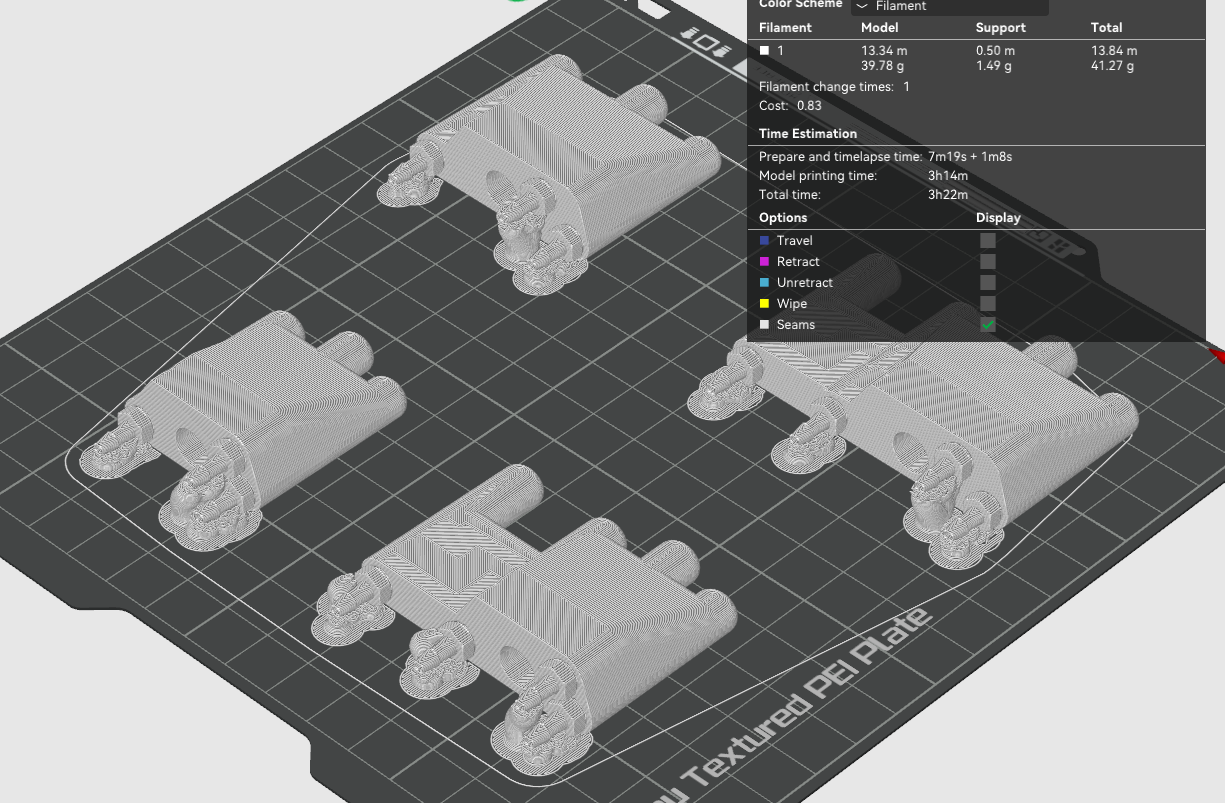
Below is a picture of the file being prepared to print in Bambu Studio:
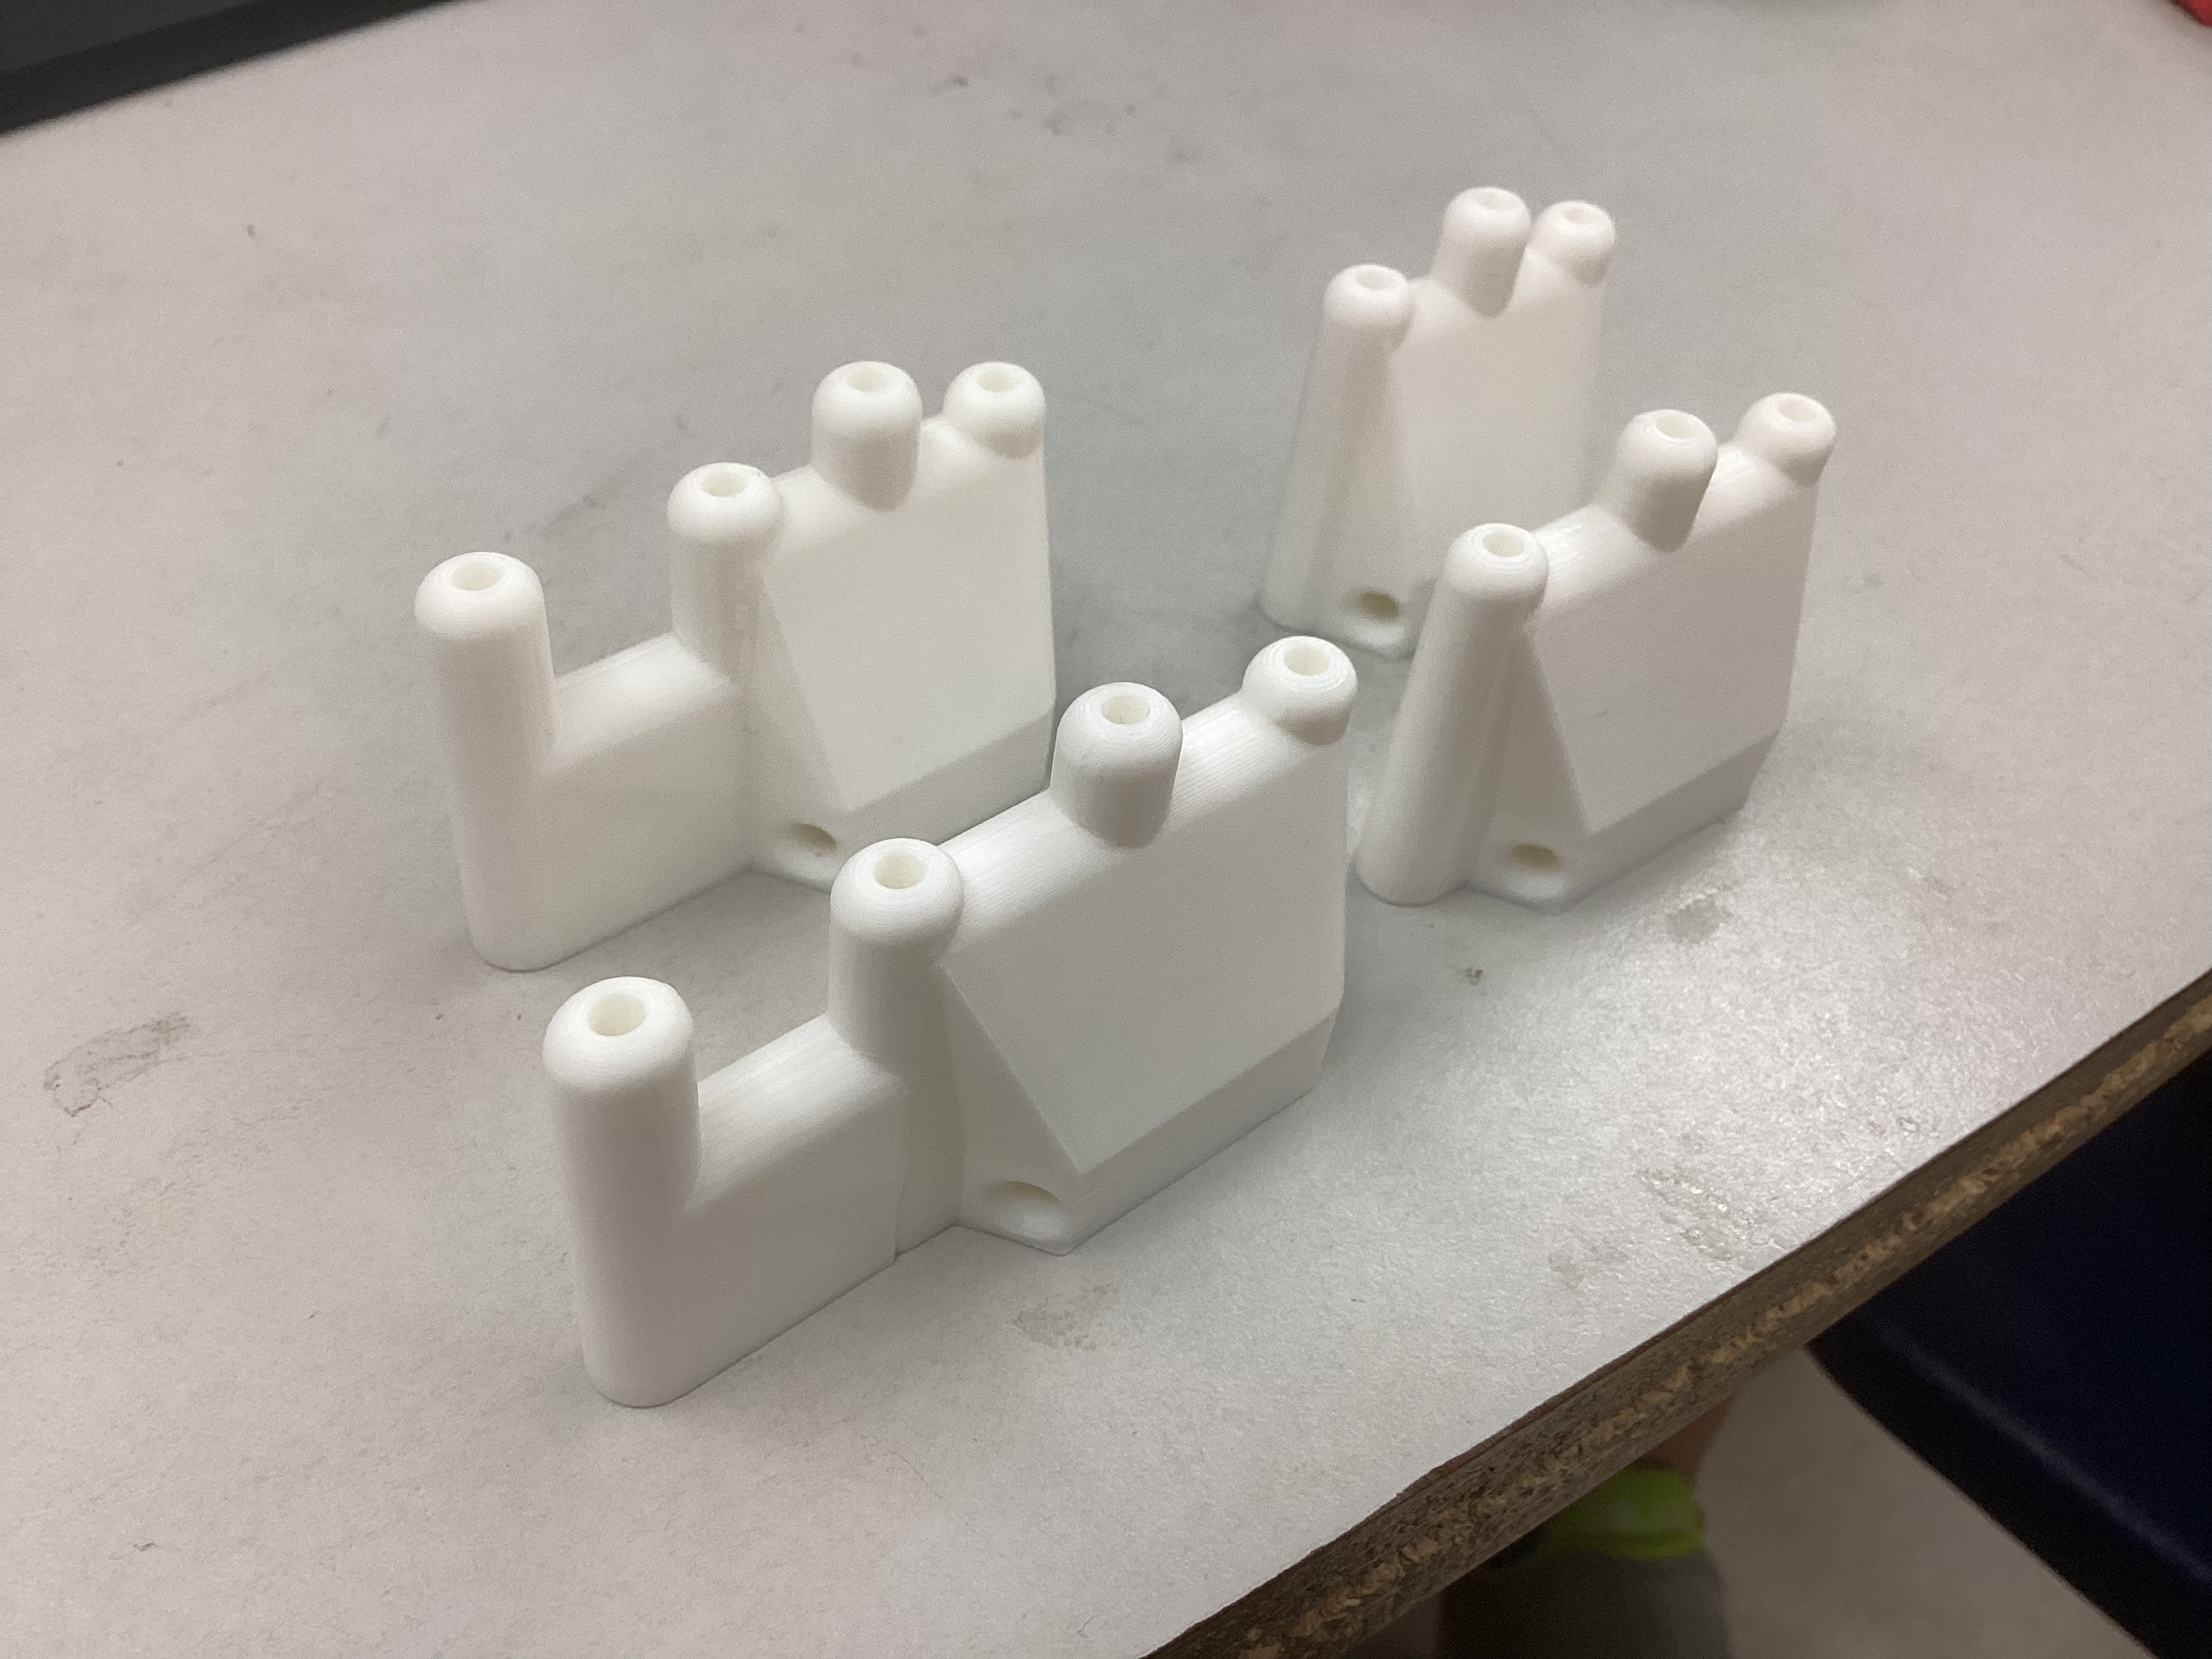
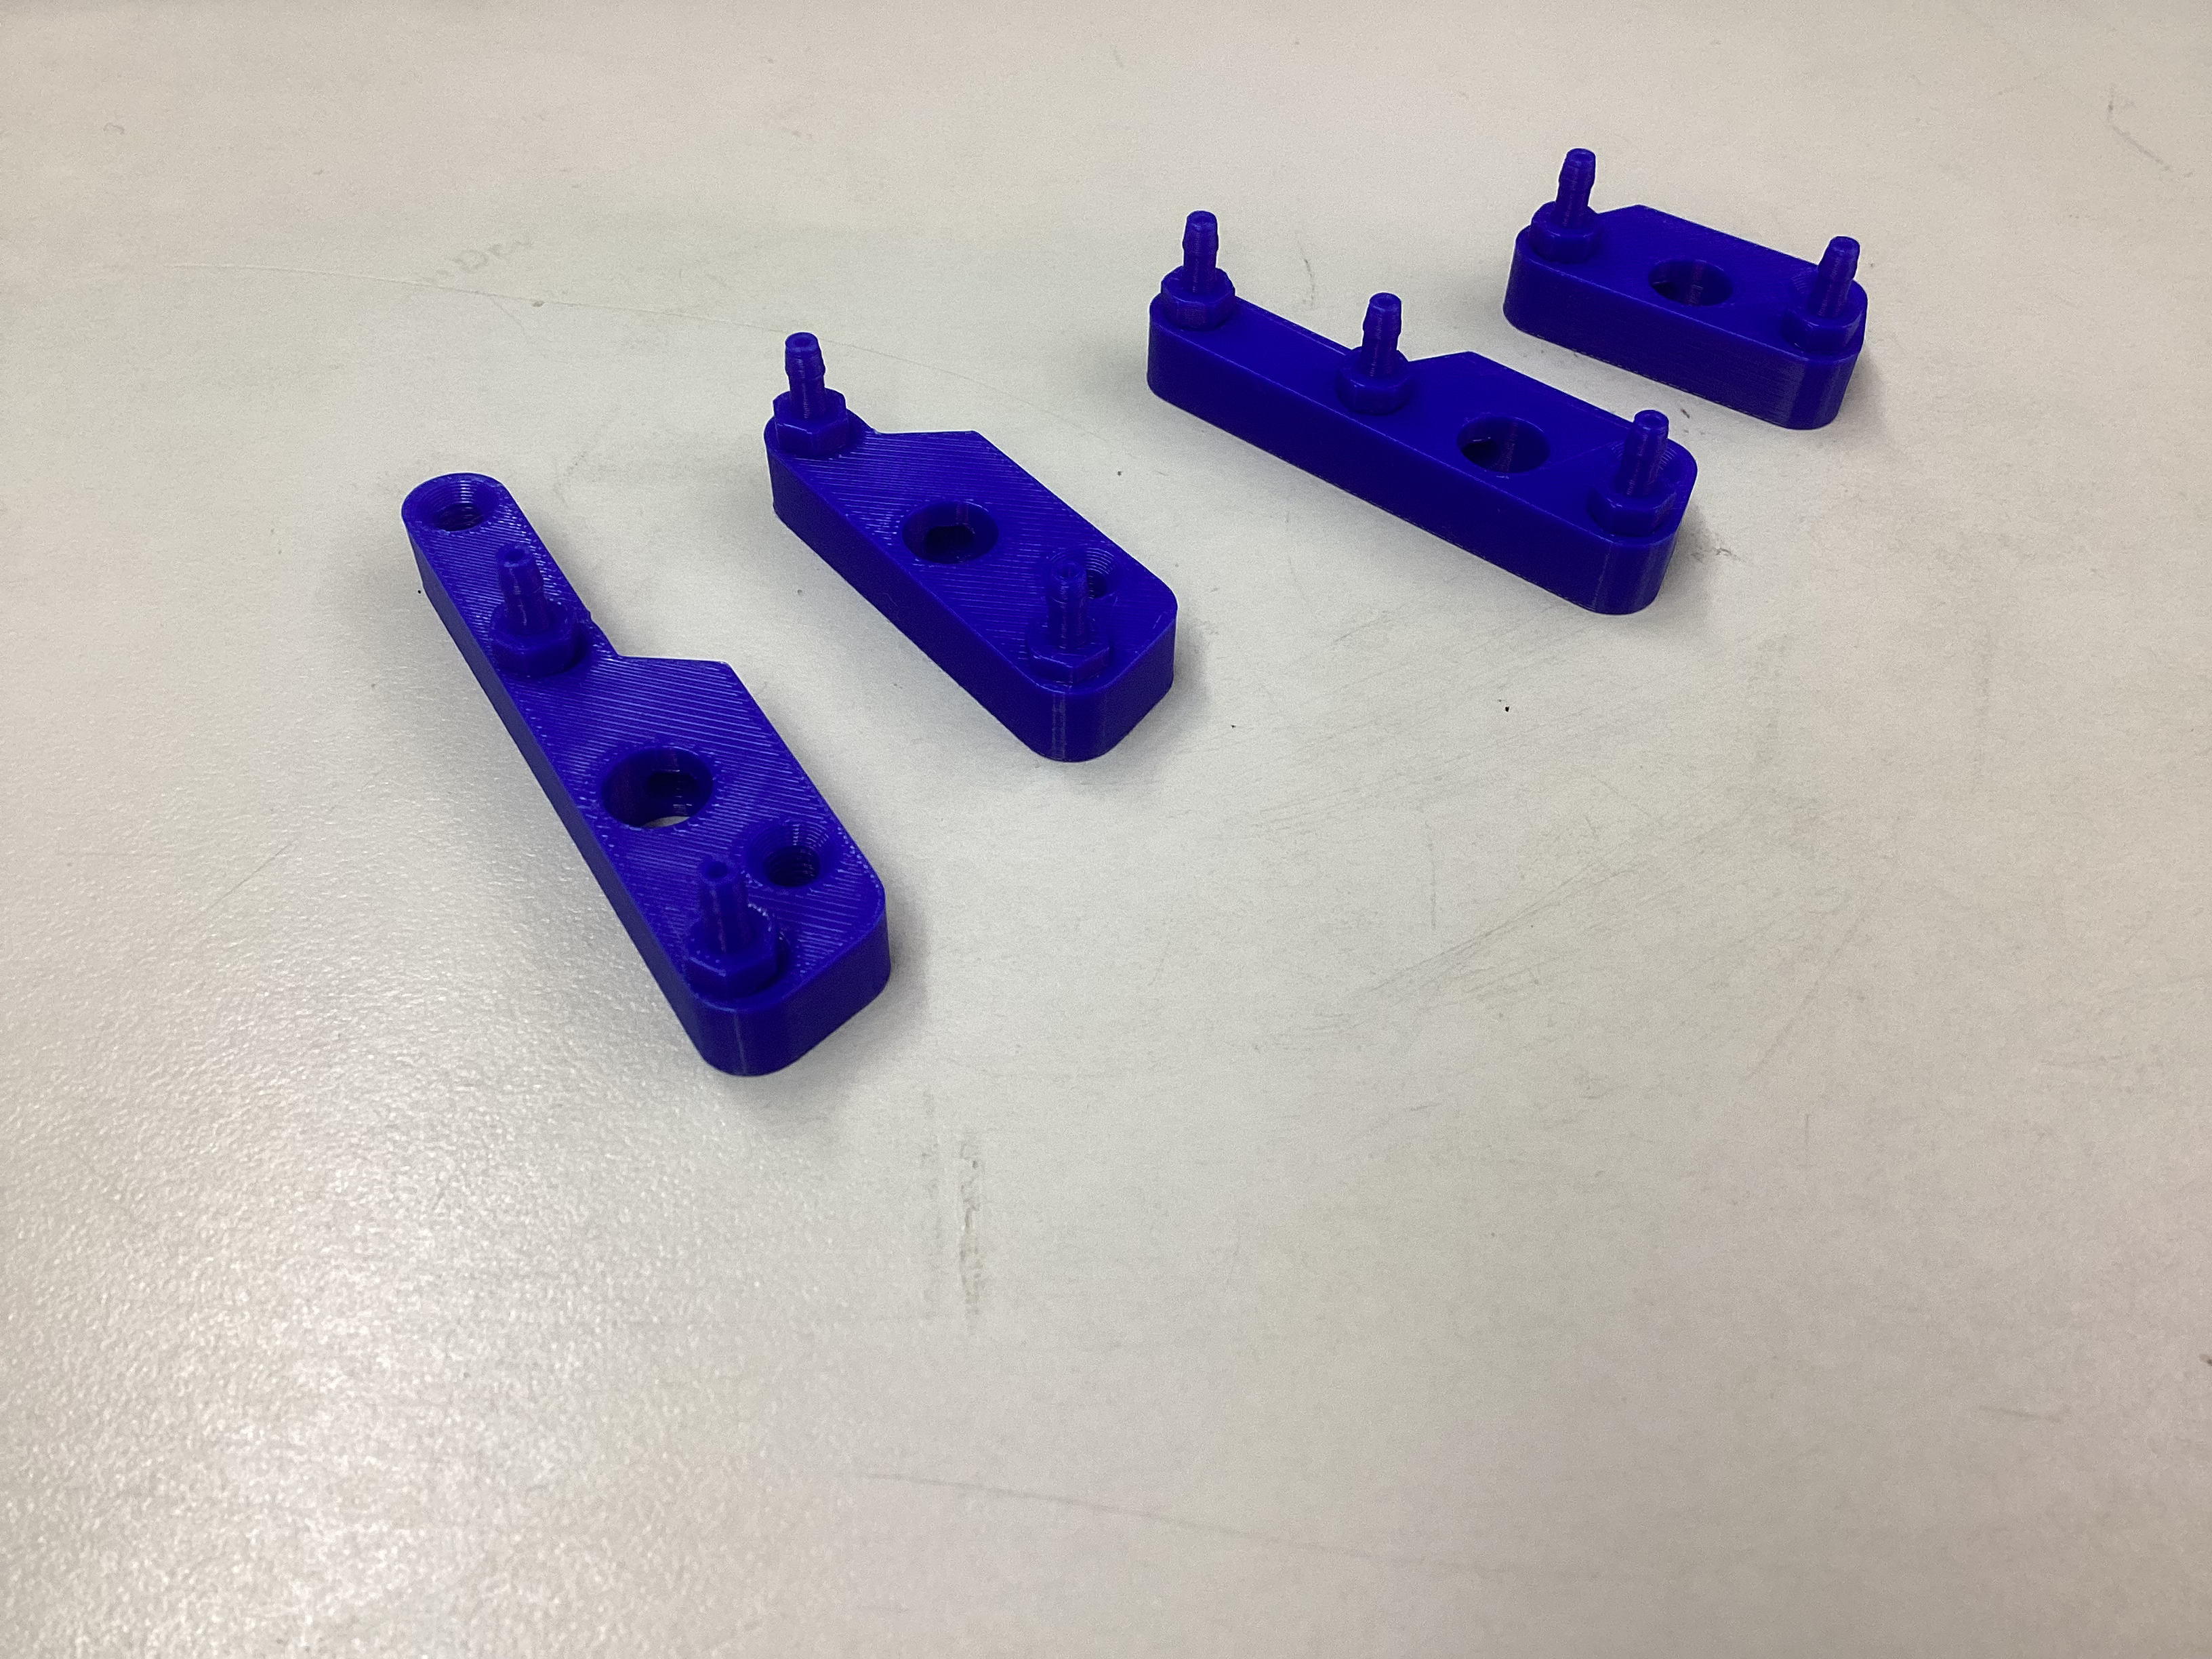
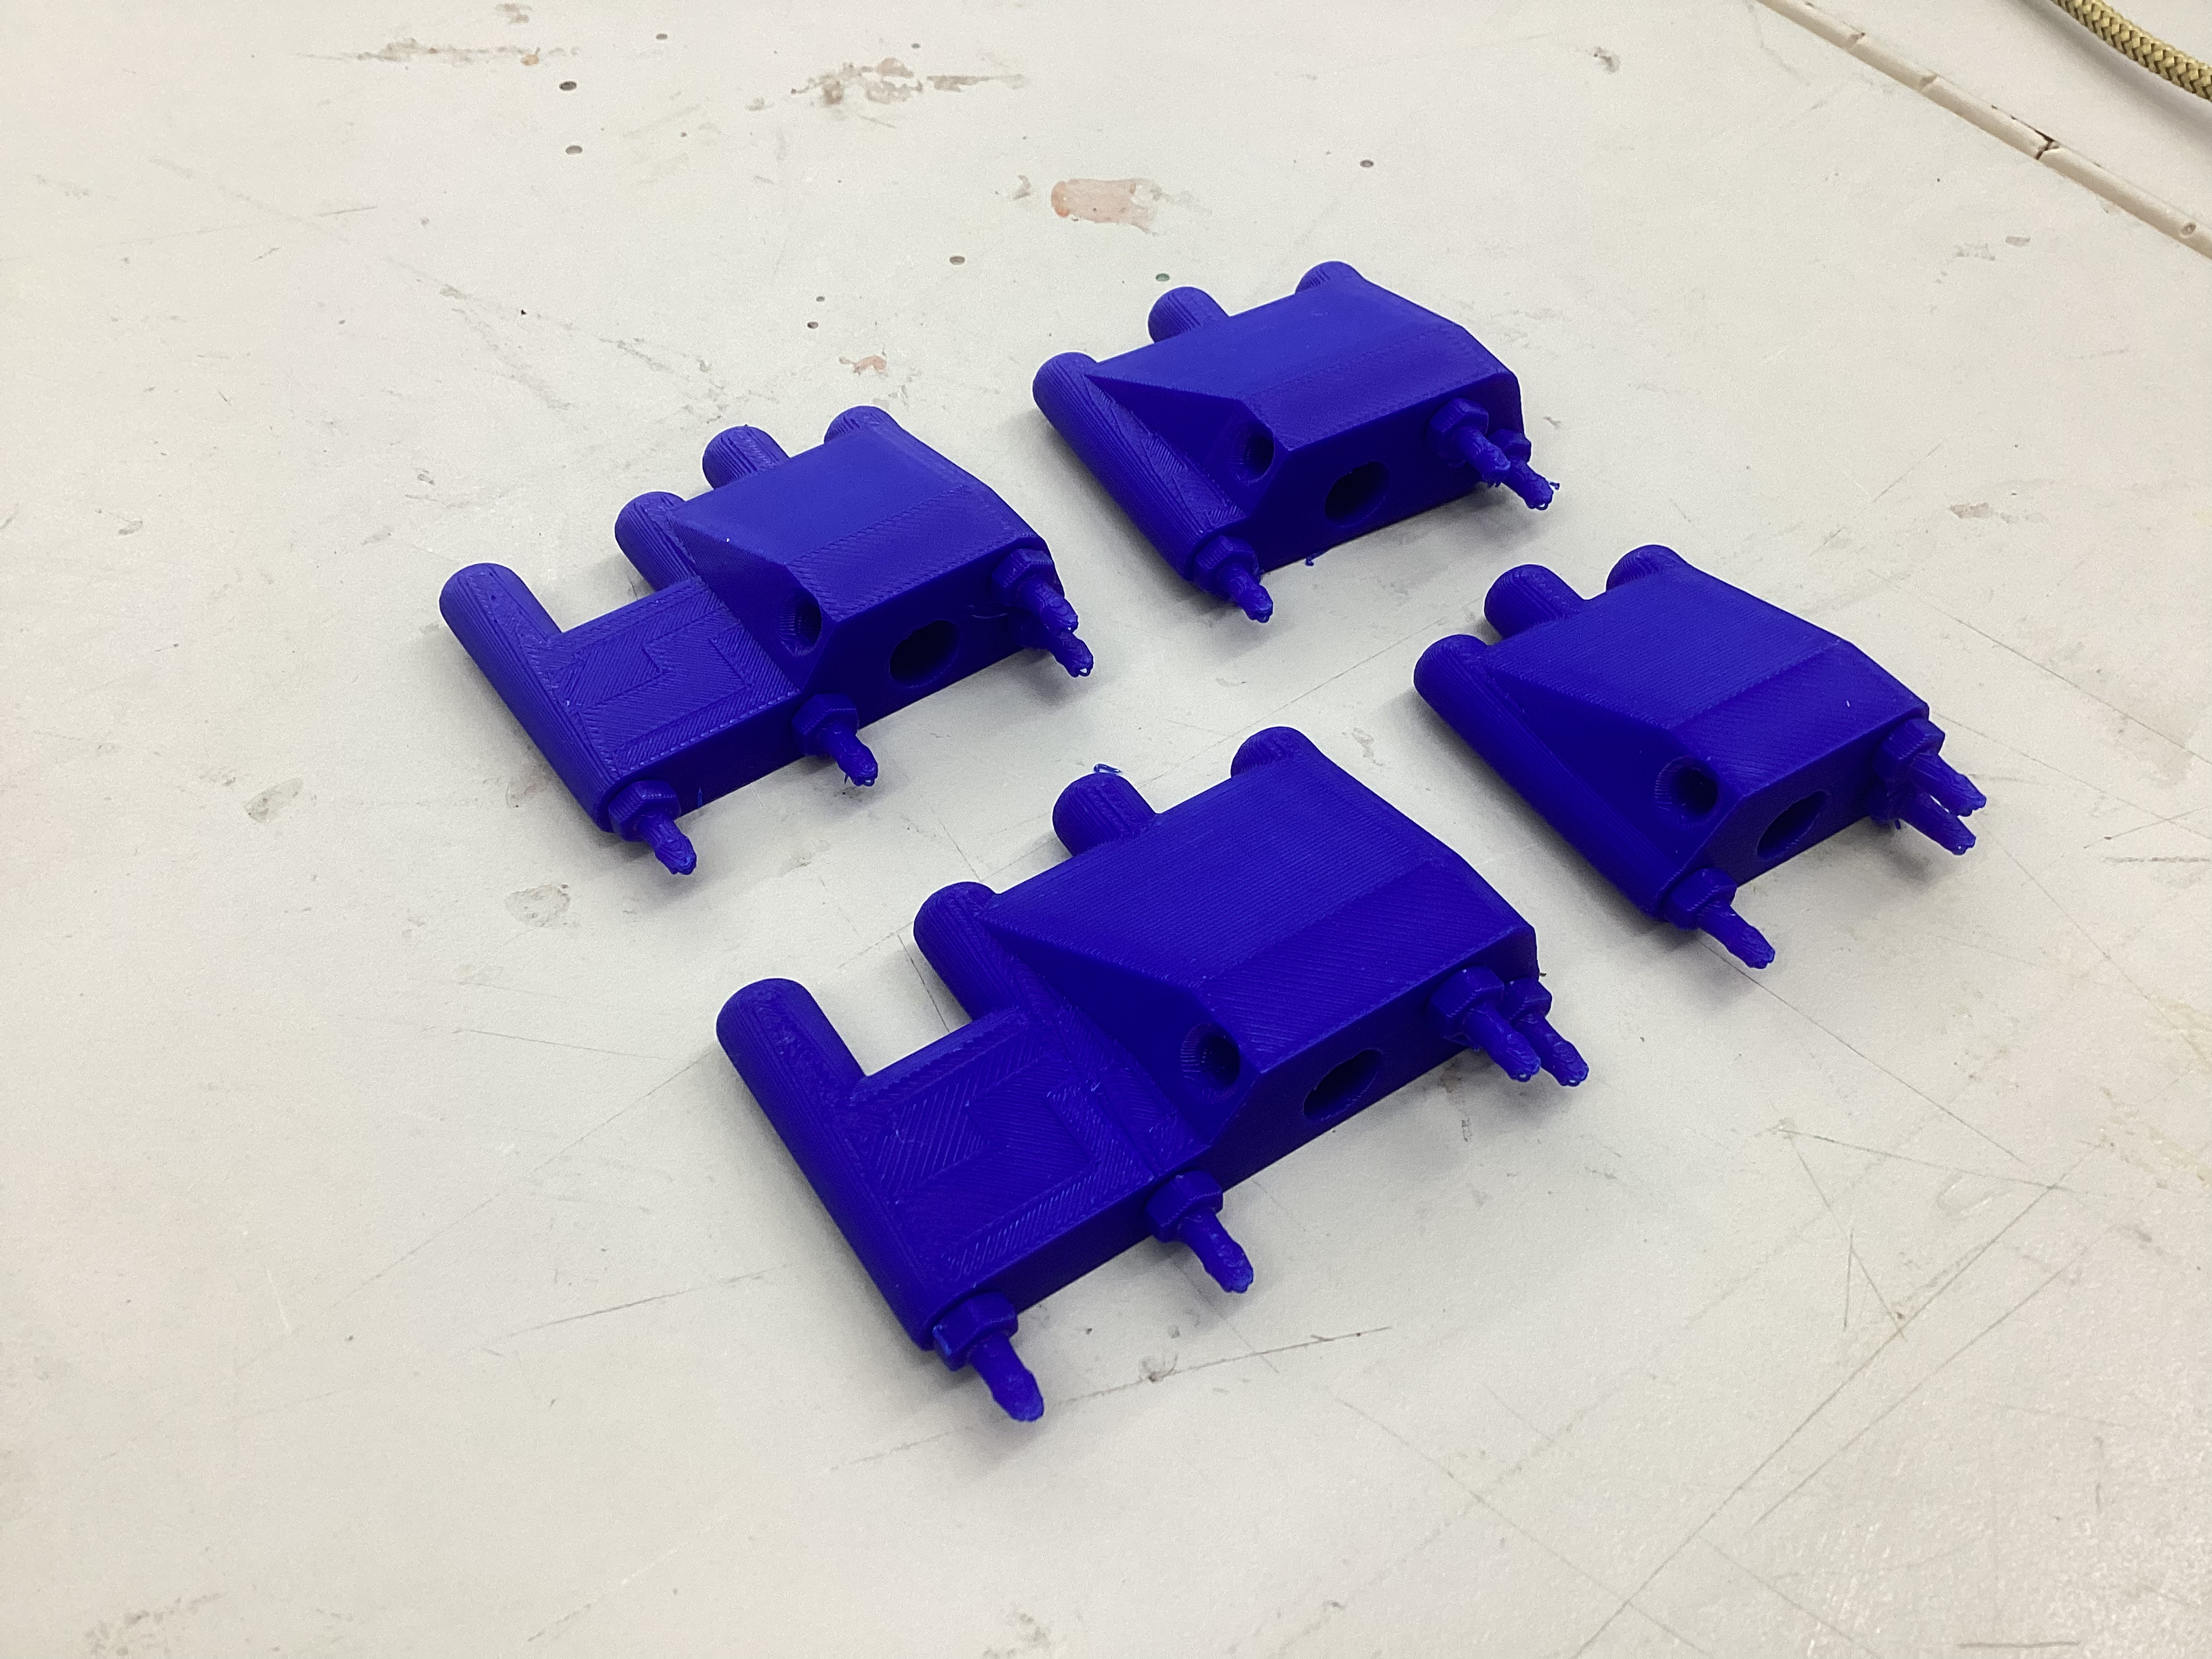
I then printed all four mouthpieces. I left the settings as the defualt, however I turned off supports becuase the print did not require them. This print requires 39.34g of PLA filament and has a cost of $0.79. I tested that the four sip-and-puff holes at the top connected correctly to the holes at the bottom, which interface with the QuadStick itself. Below are a few pictures of the four printed mouthpieces and their assets:
.png)
November 11th, 2025: An OT at Atrium Health let us know that the Atrium Health Levine Children’s Hospital has a food-safe 3D printer that they will use to print a test set of the mouthpieces. It is currently being used to create mouth sticks that are used to tap on tablets, phones, etc.
December 1st, 2025: I received an email saying that when Mrs. Smith went to install the QuadStick mouthpiece, the screws and connectors she had would not install into the mouthpiece I had created.
I searched for the screws and connectors I would need. I found this QuadStick GitHub Repository and a section called “Hardware.” There was this bill of materials file included in the repository, which detailed all of the screws and connectors required.
I found that I would need 3 Nylon Tube Fitting Barbed Adapters, 1 Nylon Thumb Screw, 3 Male Luer Integral Lock Ring to Barbs, 1 Nylon Spacer, and 1 Male Luer for each mouthpiece.
I was able to download all of the CAD 3D solidworks files for the screws and connectors off of the McCaster-Carr website. I created this file with all of the required screws and connectors to 3D print. A picture of all of them is below:

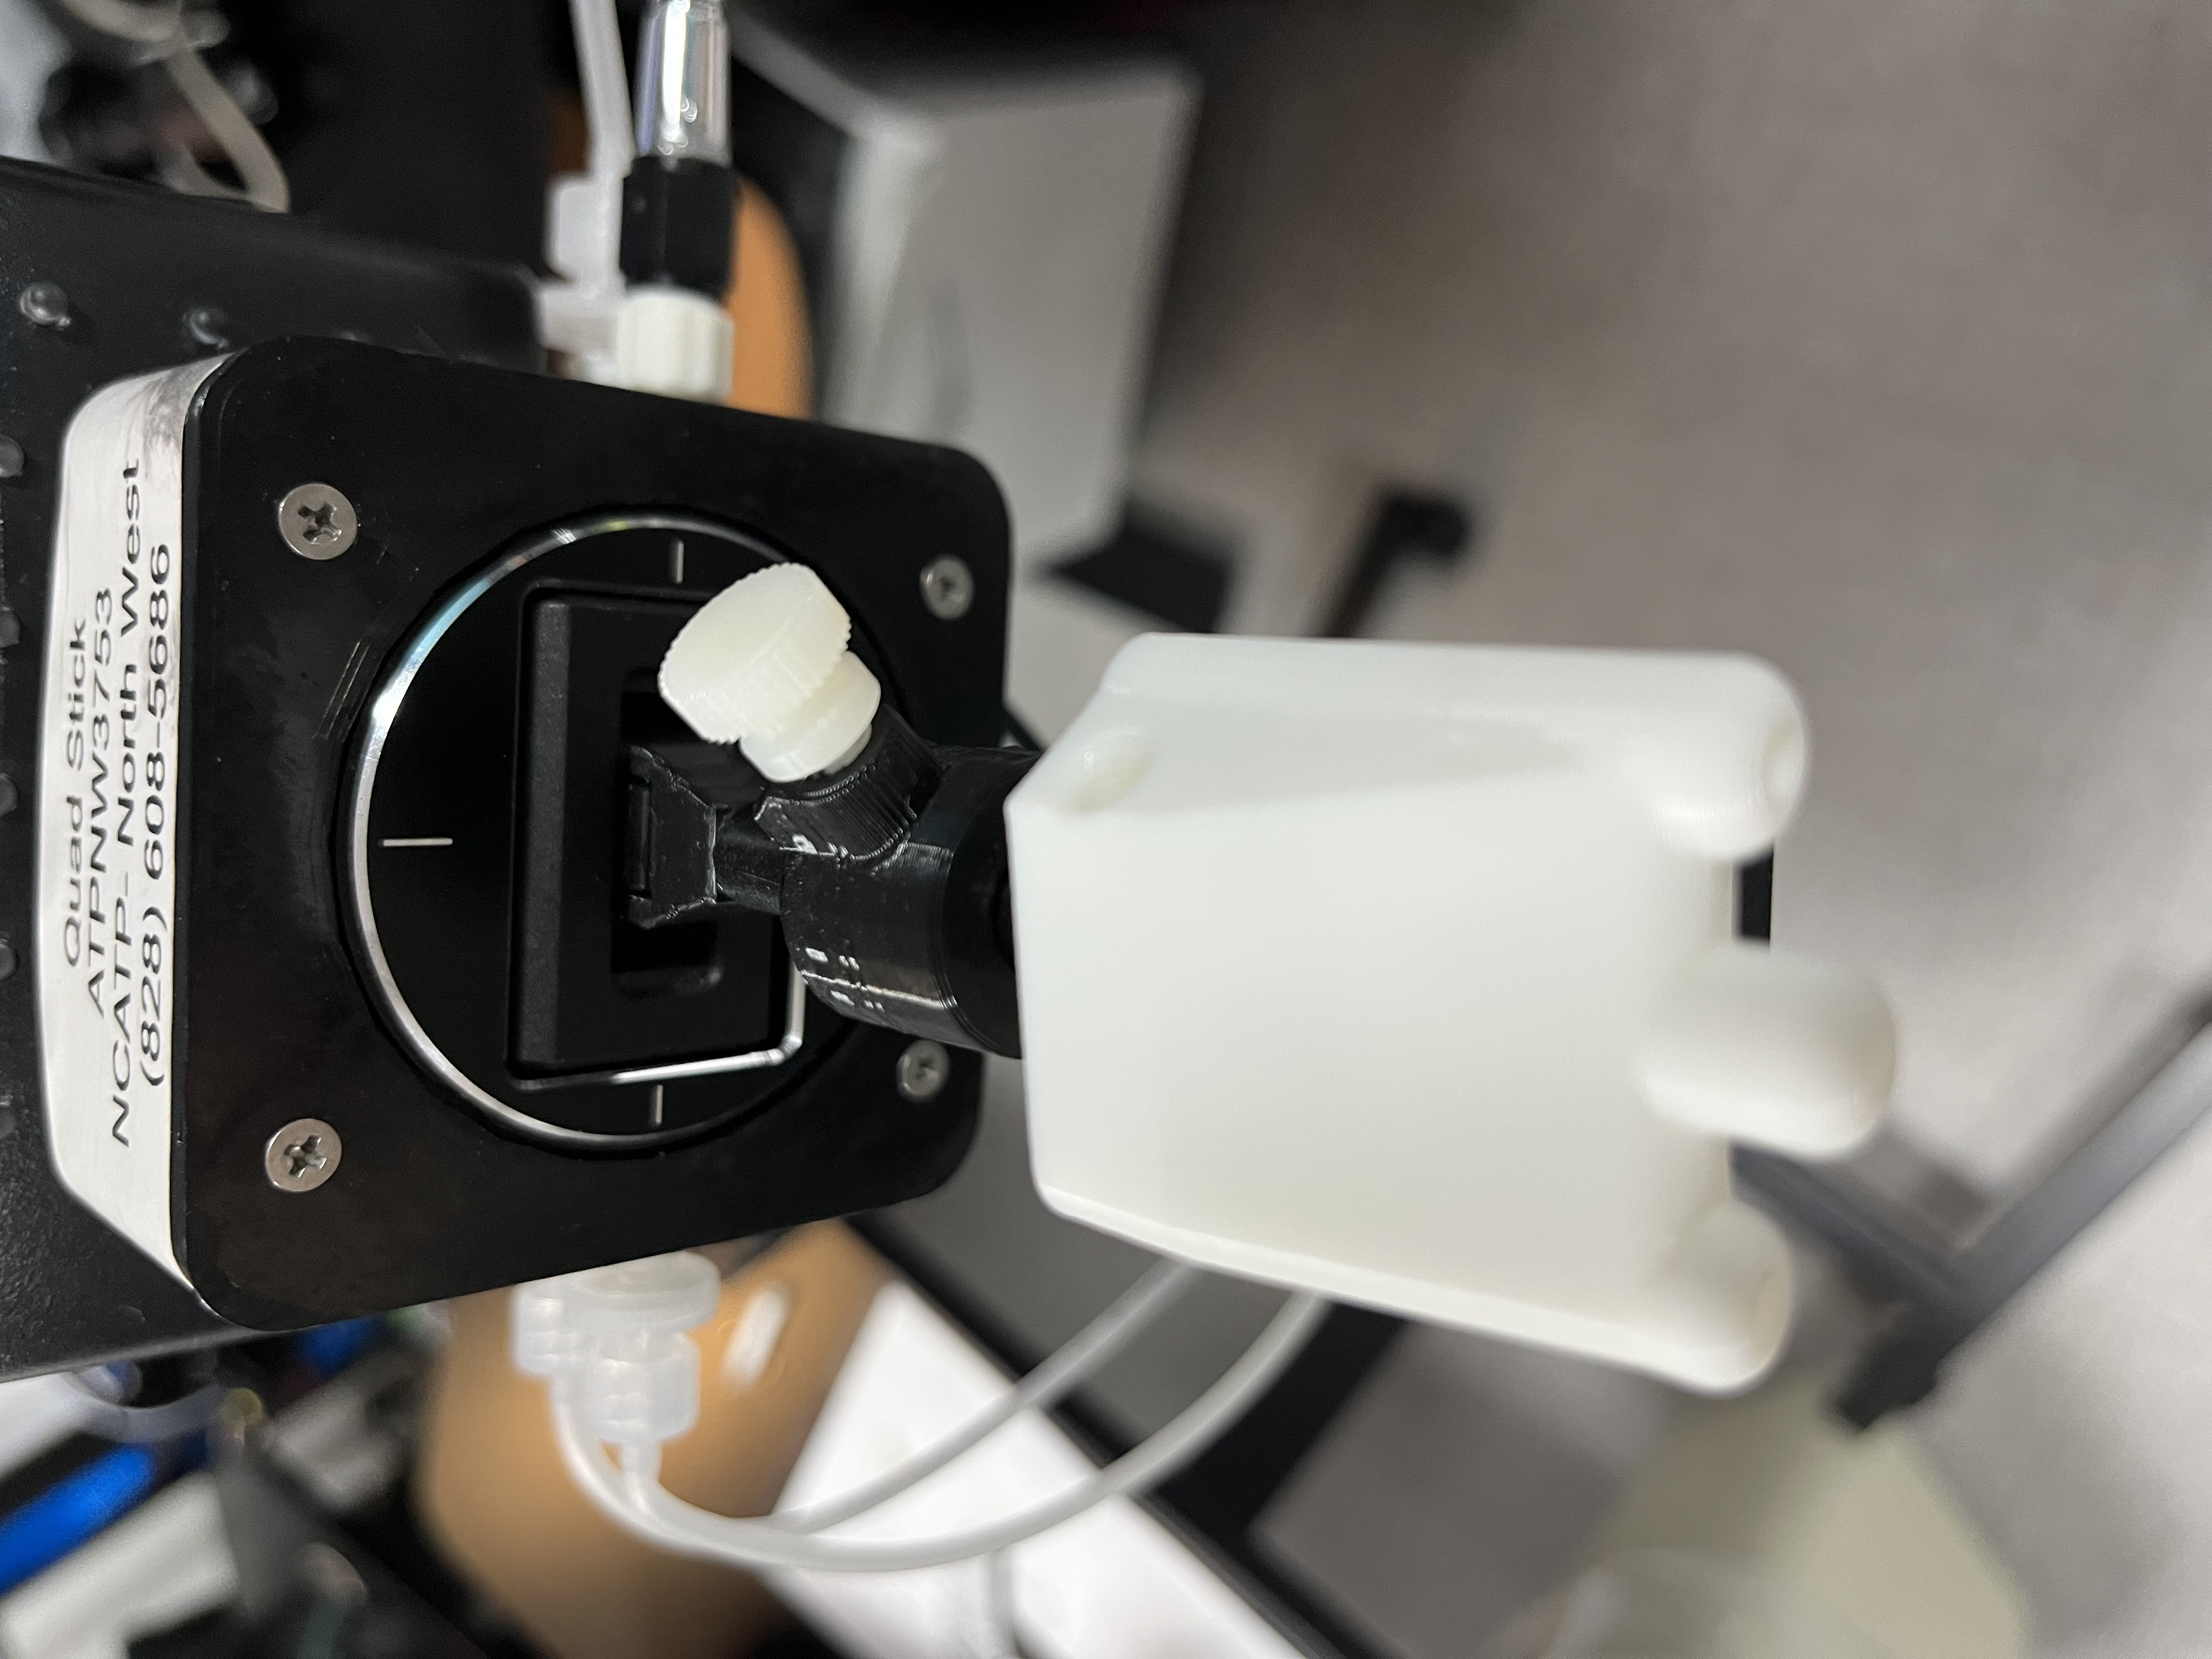
We visited the rehab center again on December 10th. I looked at their QuadStick setup and got tips on how to continue adding the screws to the mouthpiece itself. Below are some pictures of their QuadStick setup.
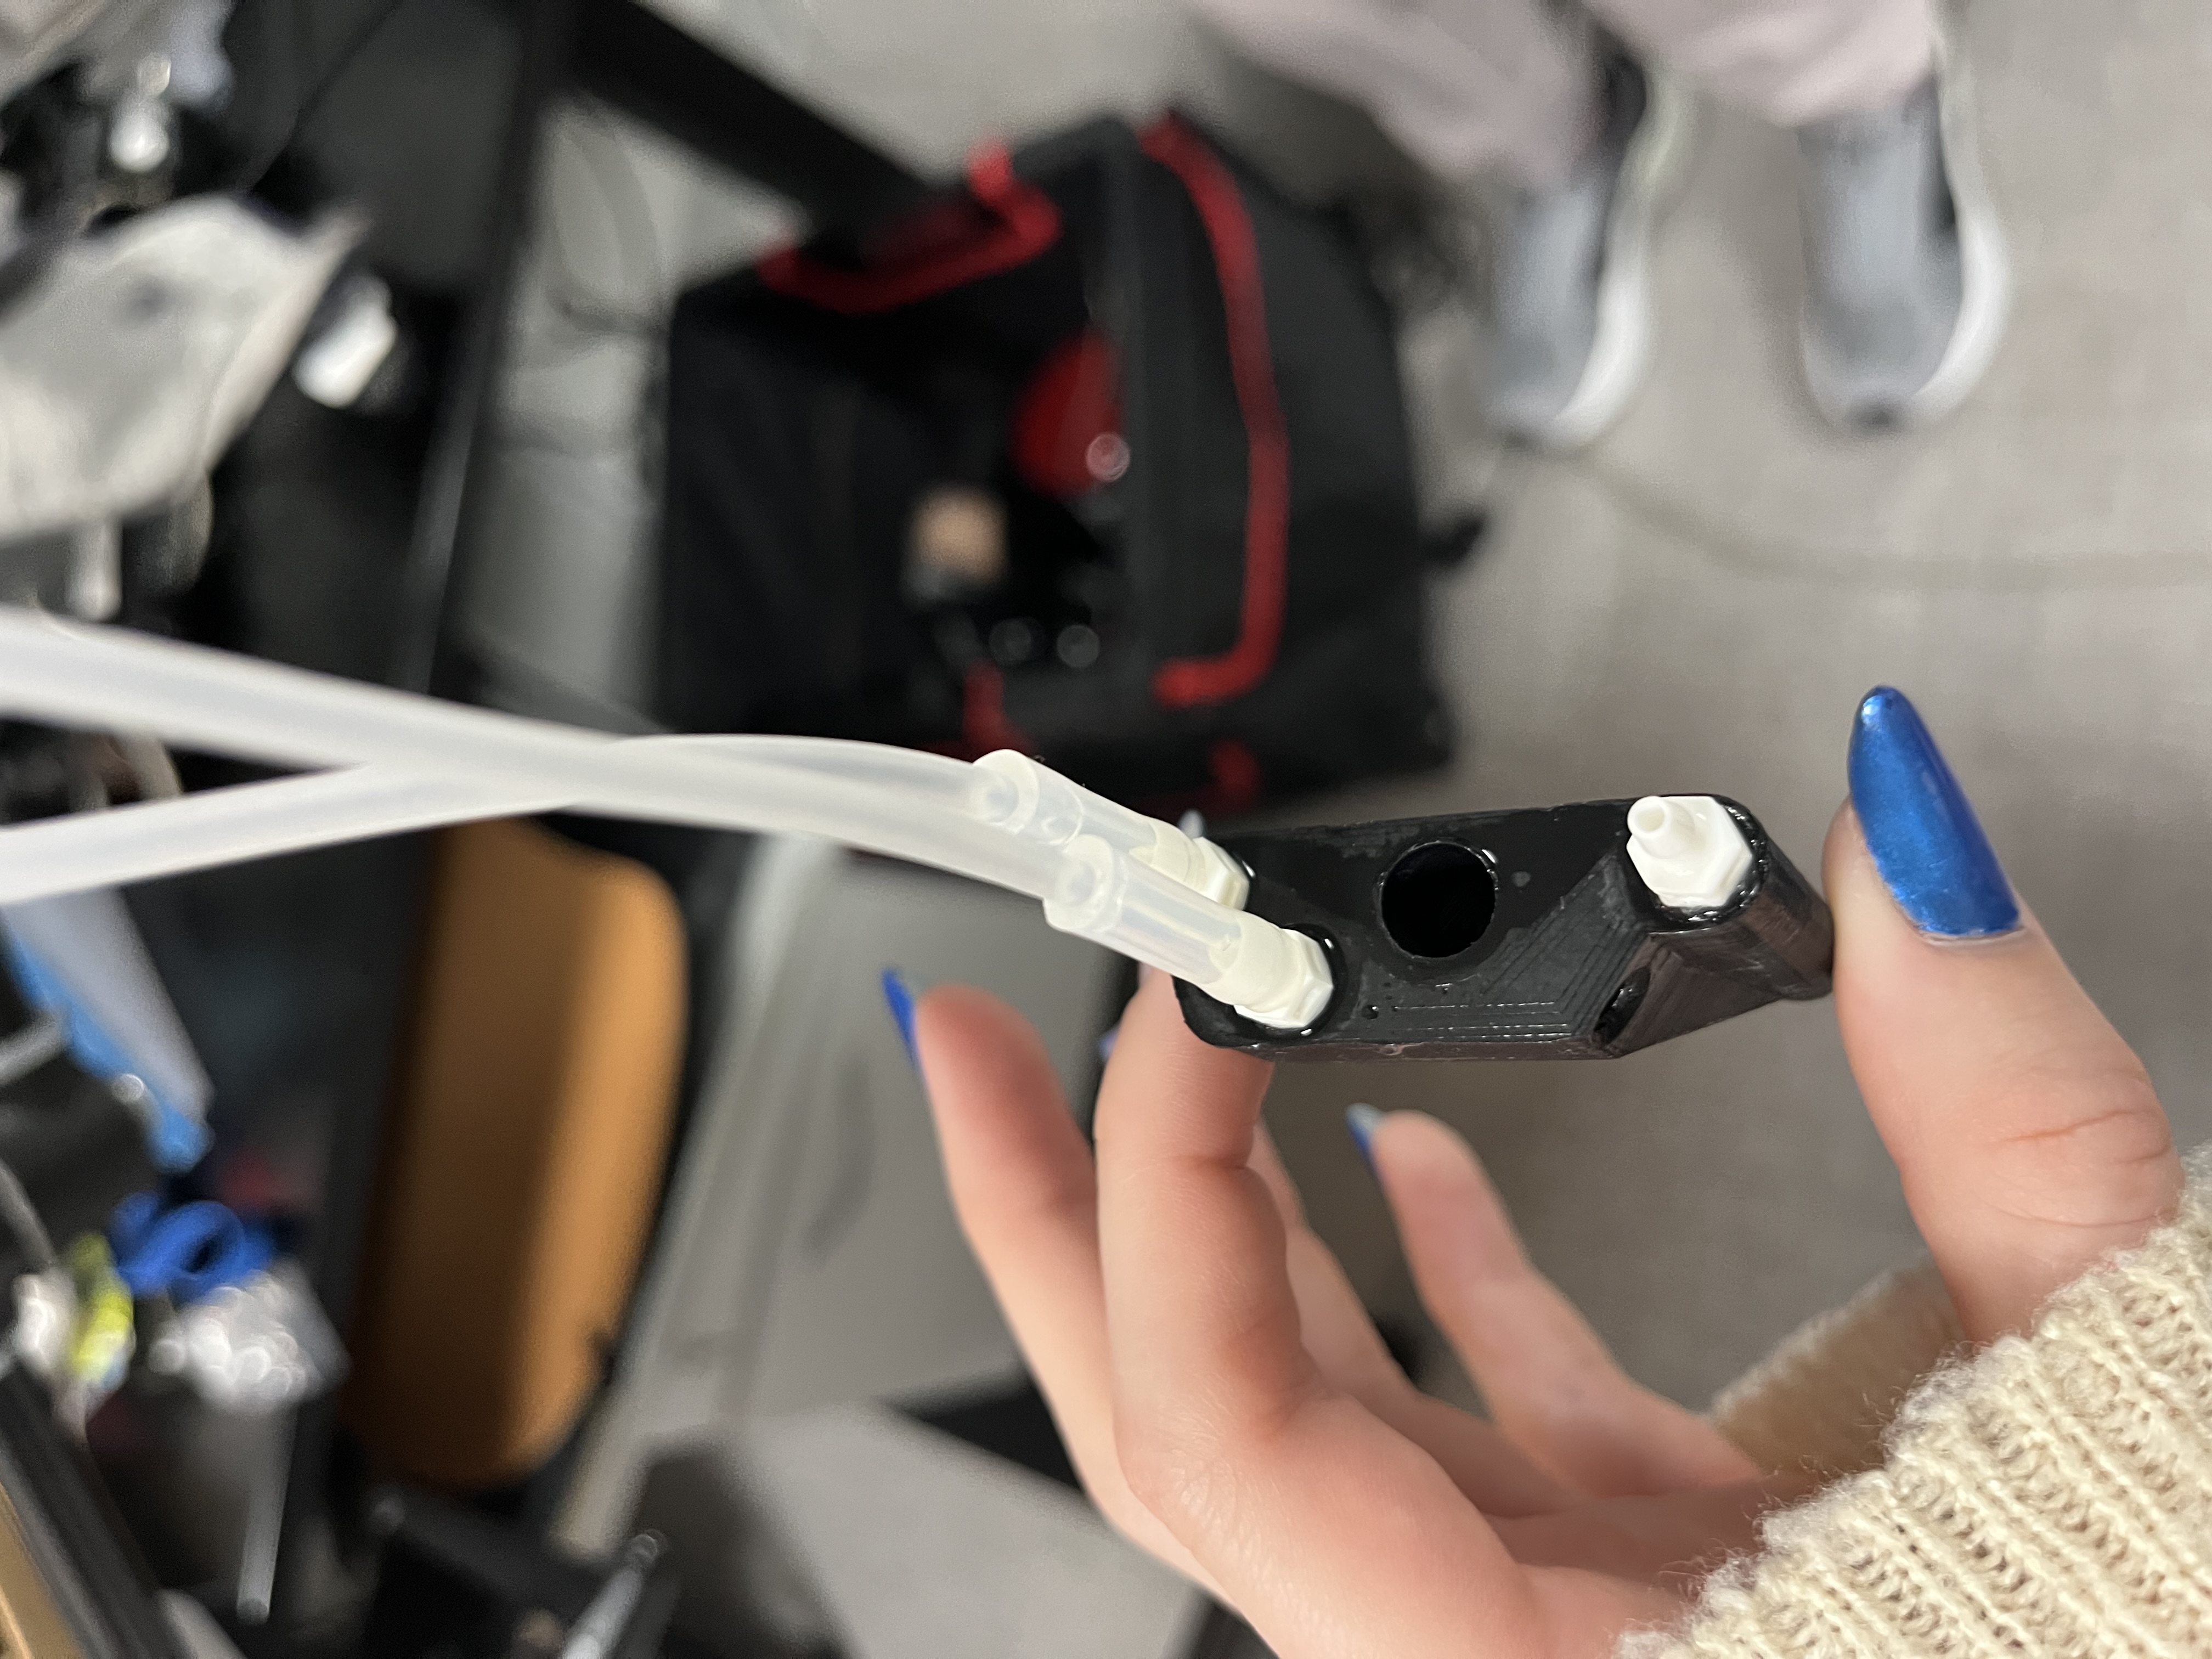
Current: I am adding the screws and connectors onto all four models of the QuadStick. I also will have to increase the size of the mouthpieces becuase the adapters on the bottom of the mouthpieces don’t fit flush into the mouthpieces. Mrs. Smith also said that the orignal mouthpiece without connectors was a little too snug on the QuadStick technology. I know that the screws and connectors are the correct size as I got the files off of the manufacturer’s website. I will continue trying prototypes on the QuadStick technology at Atrium, and our goal will still be mass production on a food-safe 3D printer.
I created a task analysis for what was left to complete for the QuadStick project before March 5th: Task Analysis
When the second semester started, I took on the challenge of adding the screws and connectors into the QuadStick mouthpieces. I took the file I had made with all of the screws and connectors and copied it into my Fusion file for the 4 mouthpieces. At first, I just moved each mouthpiece into each hole by guessing. I noticed that they weren’t fitting quite right. I remembered what Mrs. Smith had said about struggling to fit the mouthpiece onto the techonolgy.
I decided I needed to size up the mouthpieces.I went into Bambu and opened my original QuadStick file. I increased the X, Y and Z dimension up by 0.1 mm. I saved this back to Fusion. I then realized that all of the screws I had saved wouldn’t be necessary for every mouthpiece. I would need 3 (for 3 hole) or 4 (for 4 hole) of the Nylon Tube Fitting Barbed Adapters for every mouthpiece as well as 1 Nylon Thumb Screw per mouthpiece. The thumbs screw would need to be printed seperately and could not be installed as this is used to tighten the mouthpiece on and off of the technology.
I went on to install the adapters into the mouthpieces. I copied the adapters off of my original file with the screws and connectors and pasted them into the sized up Fusion file. I used the “Move/Copy” feature in Fusion to slide the adapters rght into place. I knew they were all in the correct spot when: all of the adapters were at the same height and when looking straight down at the bottom of the mouthpieces, the adapters fit inside of a small circle created by the mesh adaptation in Fusion (this is where the hole for the adapter starts to dip into the mouthpiece). Below are pictures of the adapters installed into each mouthpiece.
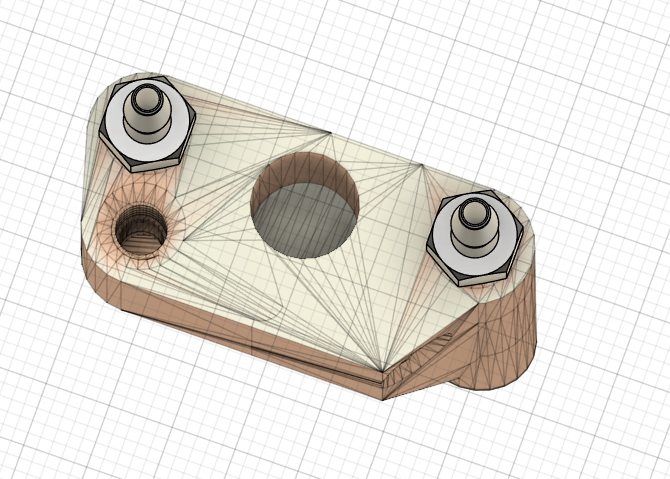
Above is a close up of how the adapters fit into the mouthpieces.
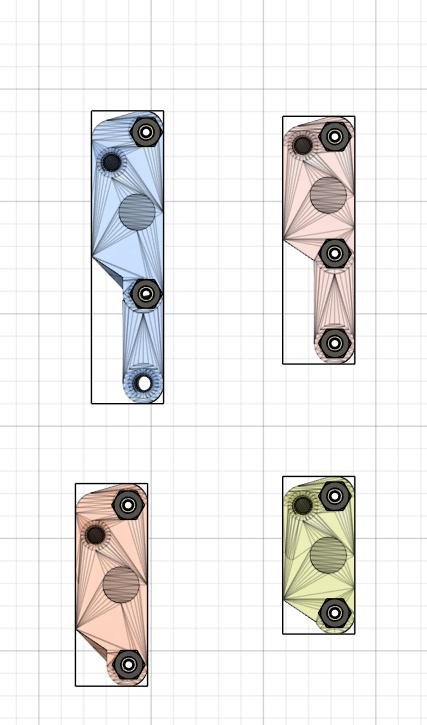
This is the straigth down view I used to get the X, Y positioning.
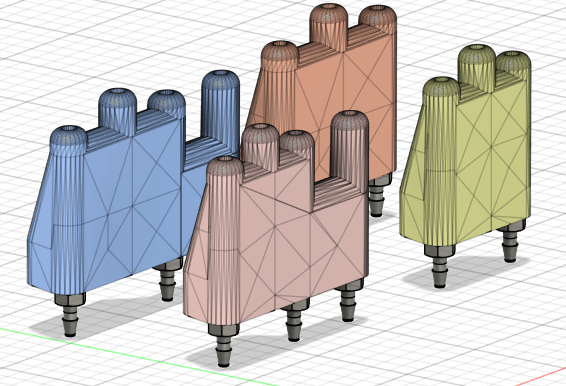
This is the mouthpieces after all of the adapters have been added.
Here is the file after all of the adapters have been added: Mouthpieces with Adapters
I then made a test print of the connection from the bottom of the mouthpiece and the connection to the adapters. In Bambu, I used the slice feature and cut off the parts of the mouthpieces I didn’t want to print. This is the slice in Bambu:
This is the printed slice:
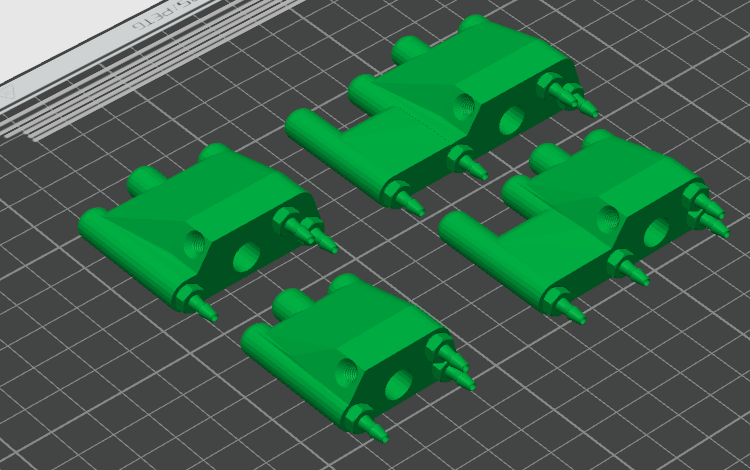
I liked how the connections came out so I printed a set of mouthpieces with the adapters. I sent the file to Bambu. It came in with the adapters toughing the print plate and the mouthpieces facing up. I rotated them and then two mouthpieces were laying flat on the print plate and two were above. I used the split tool to separate the floating two from the laying two and them moved the floating two onto the print plate. This is a picture of the 4 mouthpieces in Bambu.
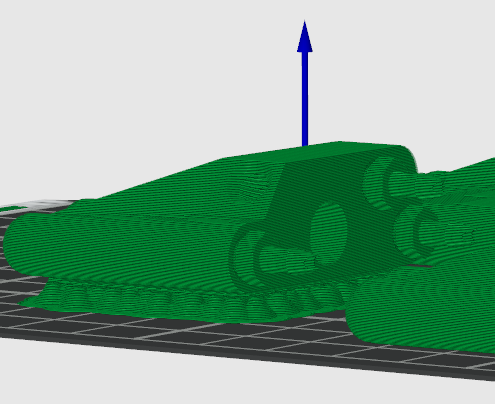
I pressed slice plate and a warning message popped up. It turned out that one of my mouthpieces wasn’t actually flush to the print plate. I used the “Manual Tree Support” option and then the “Paint Support” tool to put supports on this mouthpiece only. This shows the supports added:
This is a picture of the mouthpieces after they had been printed:
I need to test these mouthpieces on the QuadStick technology in the hosptial to know how to continue this project.
In the photo above, you can see that they all printed fine. The only problems were that the bottom of the one floating mouthpieces was slightly less smooth.
Before I was able to have the hospital test the mouthpieces, I wanted to have a file that had all of the mouthpieces flush against the print plate, and not having to have supports on the bottom. I worried that the hospital would have to add these supports manually, and I wanted to avoid that possibility. I brought the original Fusion360 file into Bambu. They were all vertical. I pressed the “Auto Orient” button and it formed the two flat on the plate, two horizontal over them formation again. I used the same split feature to separate the two layers and the same issue occured where one was levitating. I then separated the two mouthpieces that were in the top layer and then pressed “Auto Orient” again, and the floating mouthpiece became flush. I saved this file.
I then printed this new file becuase I needed a set of mouthpieces to give to the hospital to test. I printed them, and there was a Zshift that occured dring printing. I think that the back of the printer hit the wall while it was printing at one moment, and shifted the machine. I also noticed that the connector ends weren’t coming out nice as clean. There were some that had gaps, some where the filament had drooped or slanted, and I worried that the tube wouldn’t fit onto them. I went back to Bambu with this new file and pressed “Add Tree Supports.” I thought that it would help stabilize the connector ends so the filament wouldn’t droop. This automatic support addition filled in some of the holes in the mouthpiece, and I worried that I wouldn’t be able to remove it and air wouldn’t be able to move well through the tubes. I took away the supports and instead used “Add Manual Tree Supports.” I then manually painted supports underneath each connector end. This would make supports only print directly underneath the connector ends. It looked good in the preview section, and I printed this new file. Below is a picture of the mouthpieces in the preview section, flush against the plate and with the manual supports:
I ended up using the Bambu Carbon printer for this print. I had been using a Bambu Mini, and I wanted to see if the printing quality would increase. They turned out great. It was slightly more accurate to the Fusion360 3D model than on the Bambu Mini, but not a huge noticiable difference. The most major change was that the connector ends didn’t droop or gap at all. The file for this STL is here: QuadStick Mouthpieces - Connectors and Supports.
We had a meeting with Mrs. Smith on March 4th. She told me that the newest set of mouthpieces I had given her fit onto the QuadStick perfectly. All of the tubes fit on to the adapters well and the air moved through perfectly. The only issue was that the screw that kept the mouthpiece onto the QuadStick didn’t fit well. The good thing was that I already had a file for the screw. My plan is to add 4 screws to the file so that each mouthpiece come with a screw. I won’t insert it like the adapters because I need it to move in and out.
When I retrieved it from the printer, the part where the supports were attached has not very clean. It didn’t fit into the part it should have because of the impurities. Below is a picture:
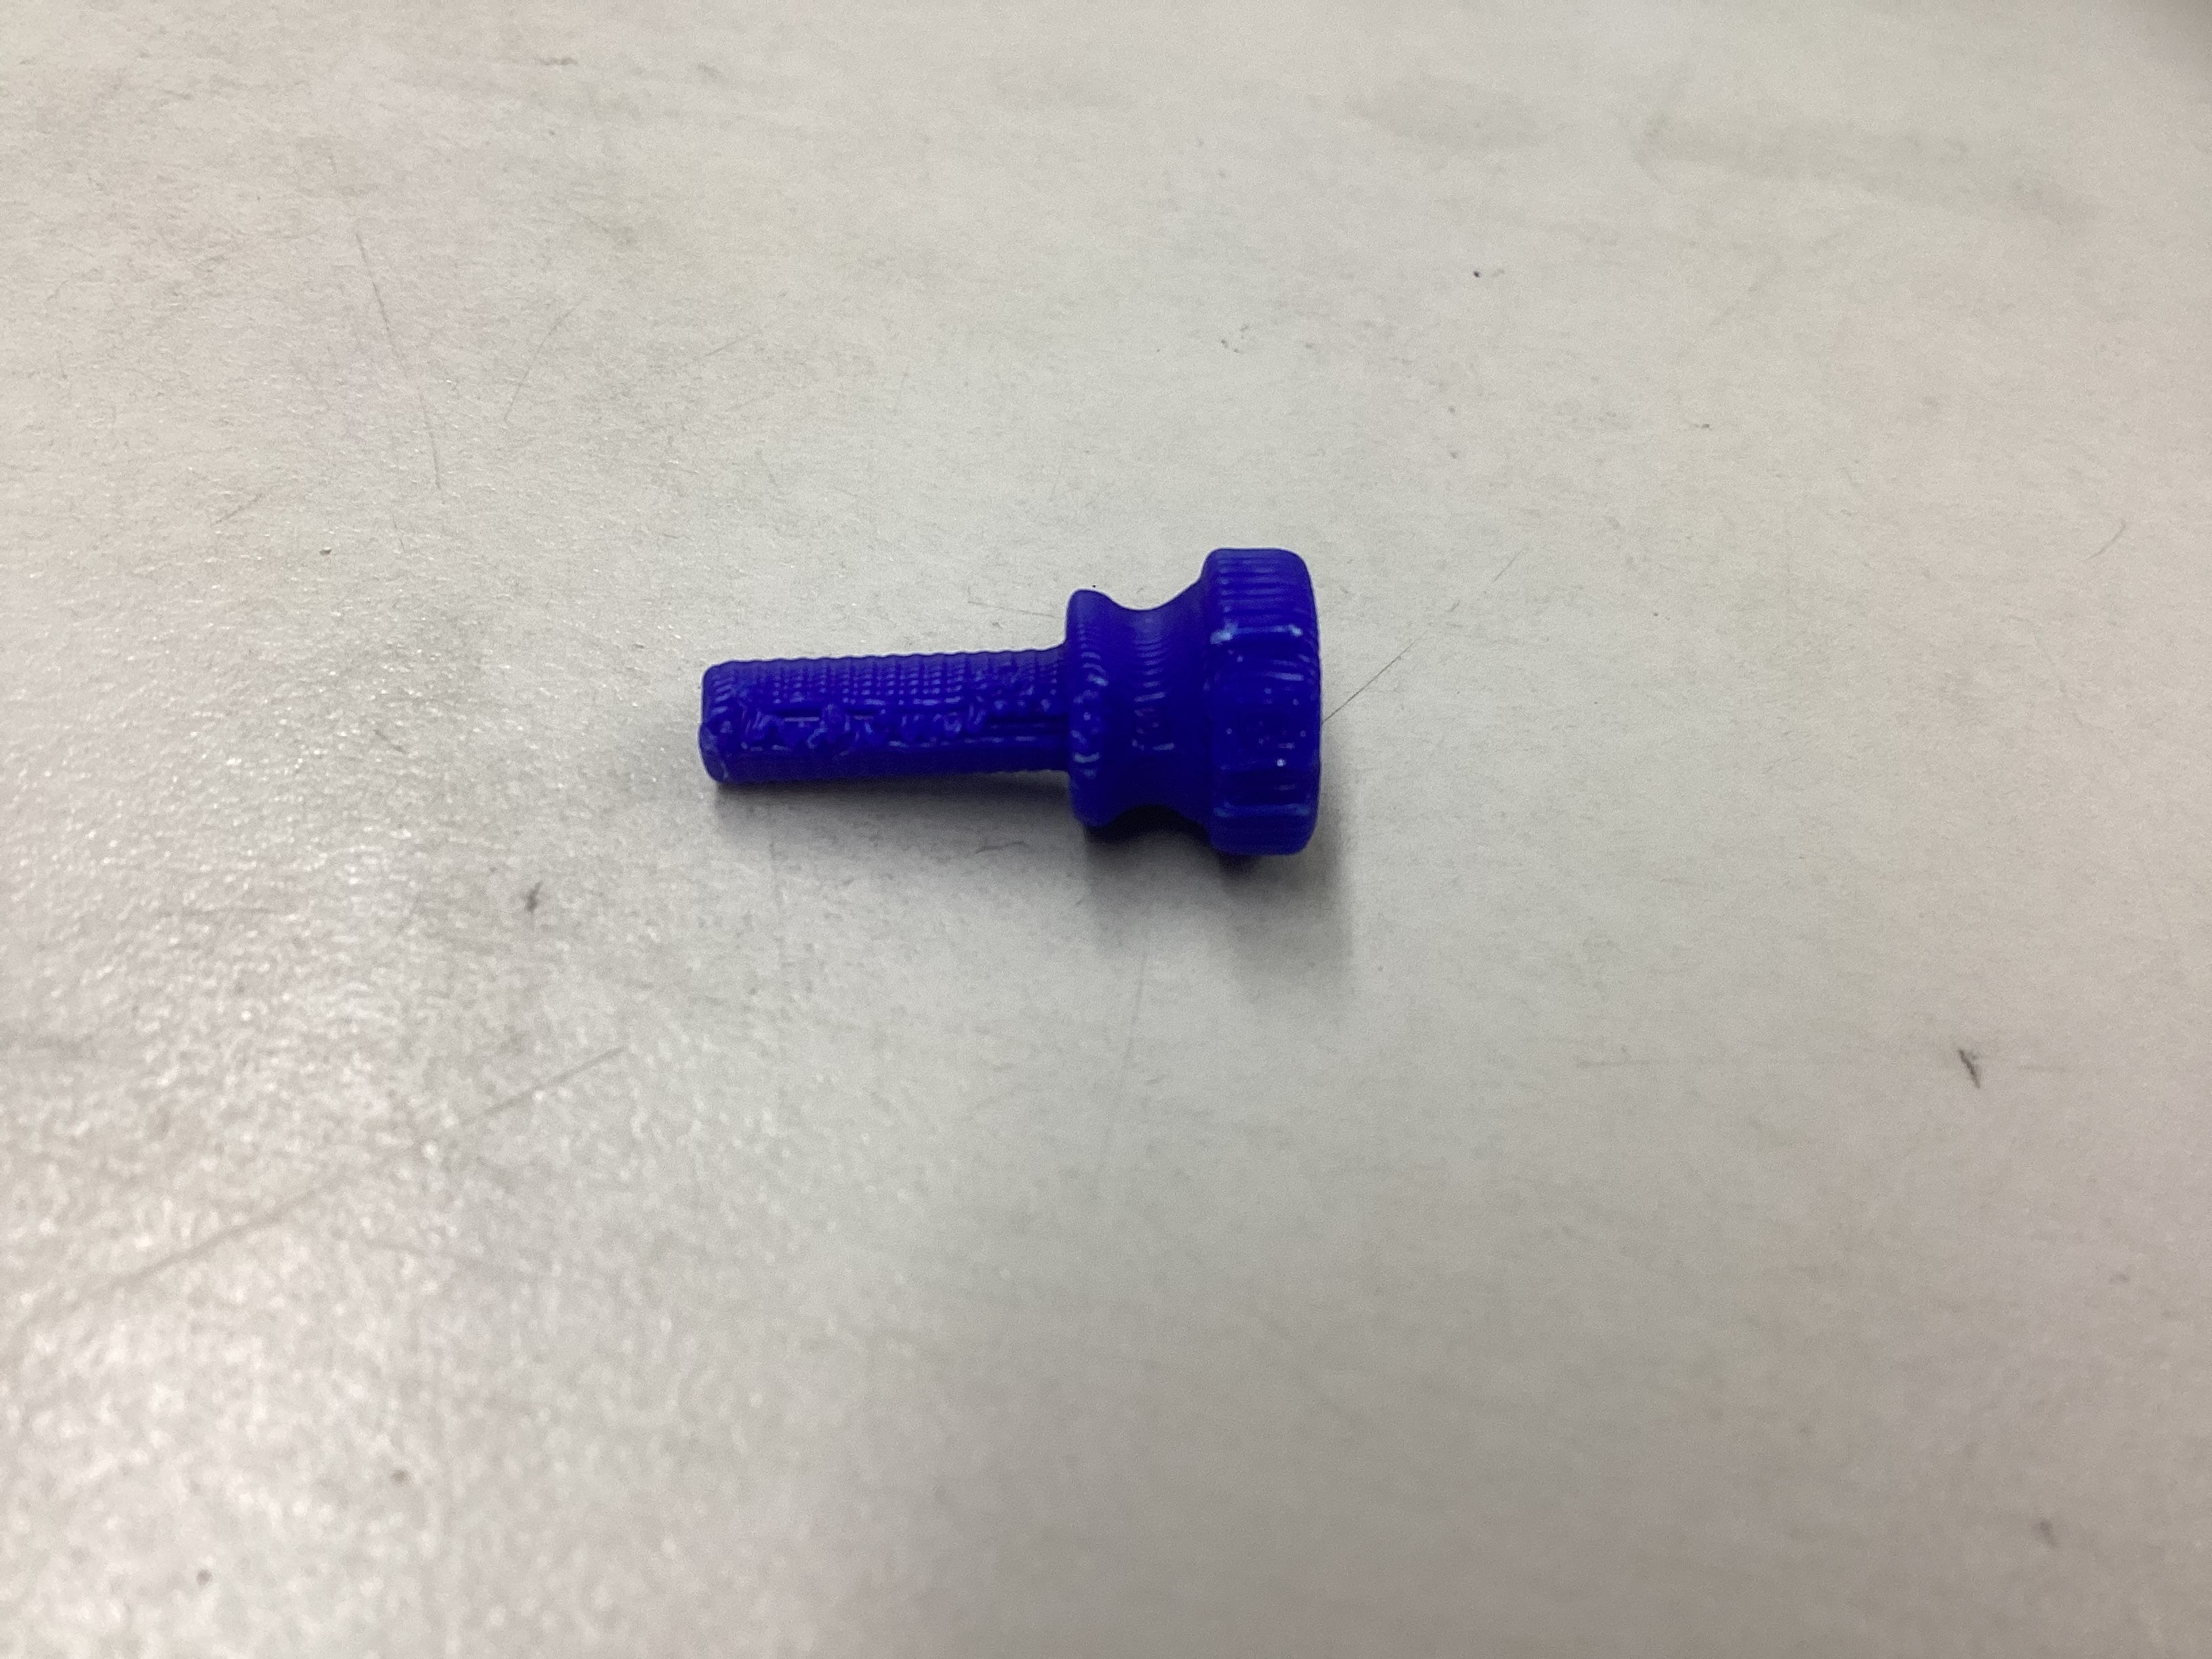
To fix this, I rotated the screw so that the top of the screw was on the print plate. The screw was printed out perfectly, yet it still didn’t fit into the mouthpieces.
I first attempted to make the design parametric in Fusion360 so I could downsize the entire file while keeping the scale uniform. I asked a friend for help since she had worked with parametric designs before, and she said the threading on the screw would be incredibly difficult to make into a parametric design.
My plan then become to scale the screws down in Bambu. I made 4 different scale test, as this portion of the project would be trial and error. The first was 100% scale, the second was 98%, then 96%, and 94%. Below is a picture of the 4 screw trials in Bambu:
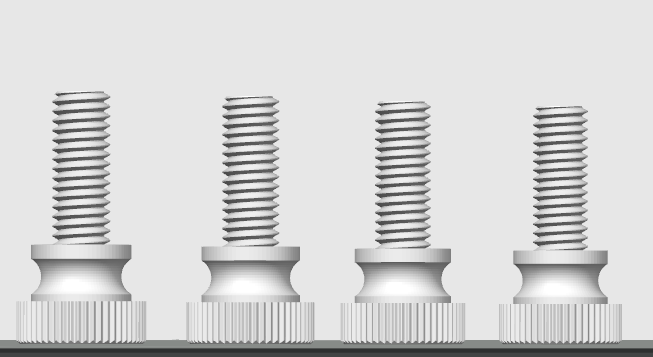
They were all too big, so I did another set of screws at 92%, 91%, 90%, 89%, and 88%. I found that the 88% version fit very well into the mouthpiece. I started another print with 4 of the 88% screws to make sure that it fit into all 4 versions of the mouthpiece.
I then made a file with the 4 mouthpieces and the 4 screws. I had to figure out how I could share the file with the supports painted on, as I did not want to make the Atrium employees have to paint on supports before every print. It would not export the support painting as an STL file, so I asked ChatGPT and it said that a 3mf file would export the painting. The STL version of the file is here: QuadStick Mouthpieces and Pieces (STL). The 3mf version of the file is here: QuadStick Mouthpieces and Pieces (3mf). Below is a picture of the file in Bambu:

Note: This picture does not show the support painting.
I printed this file to make sure the connections were still clean after adjusting and combining the pieces and mouthpieces.